Manual Guide

Introduction

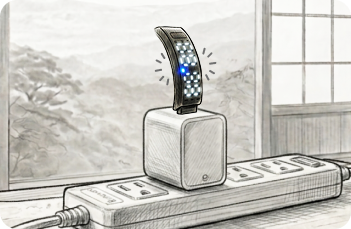
When using the wristband for the first time, please unplug it to charge it it can be directly used on any computer Or charged on a USB charger)

Warm Tips:

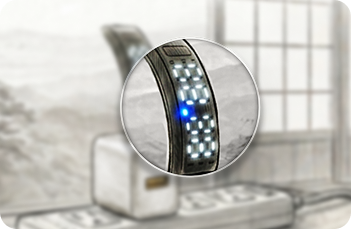
  • Please charge the wristband in the correct charging direction. If the blue light flashes, it means charging is in progress. If the blue light stops flashing, it means charging is complete.
  • Before the first use, it should be charged to 100% and the charging time is about 1 hour.
  • Avoid using high-power charging heads. It is recommended to use 1A~2A charging heads to extend the lifespan of the wristband.
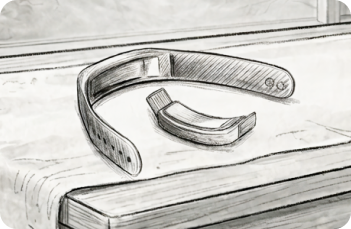
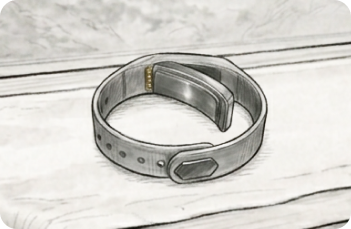
  1. Insert the USB side of the watch core into the watch strap in this direction, USB interface facing the direction of the strap hole.
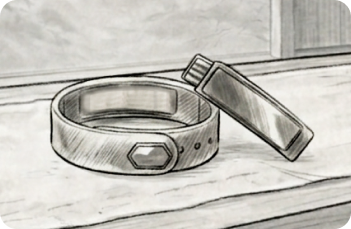
  2. After inserting the USB side into the watch strap as shown in the picture, gently pull the strap to fully insert the watch core into the strap.
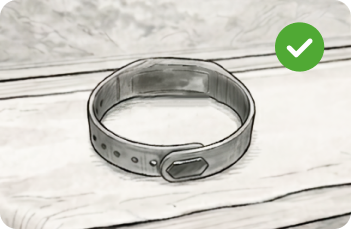
  3. As shown in the picture, for correct installation.
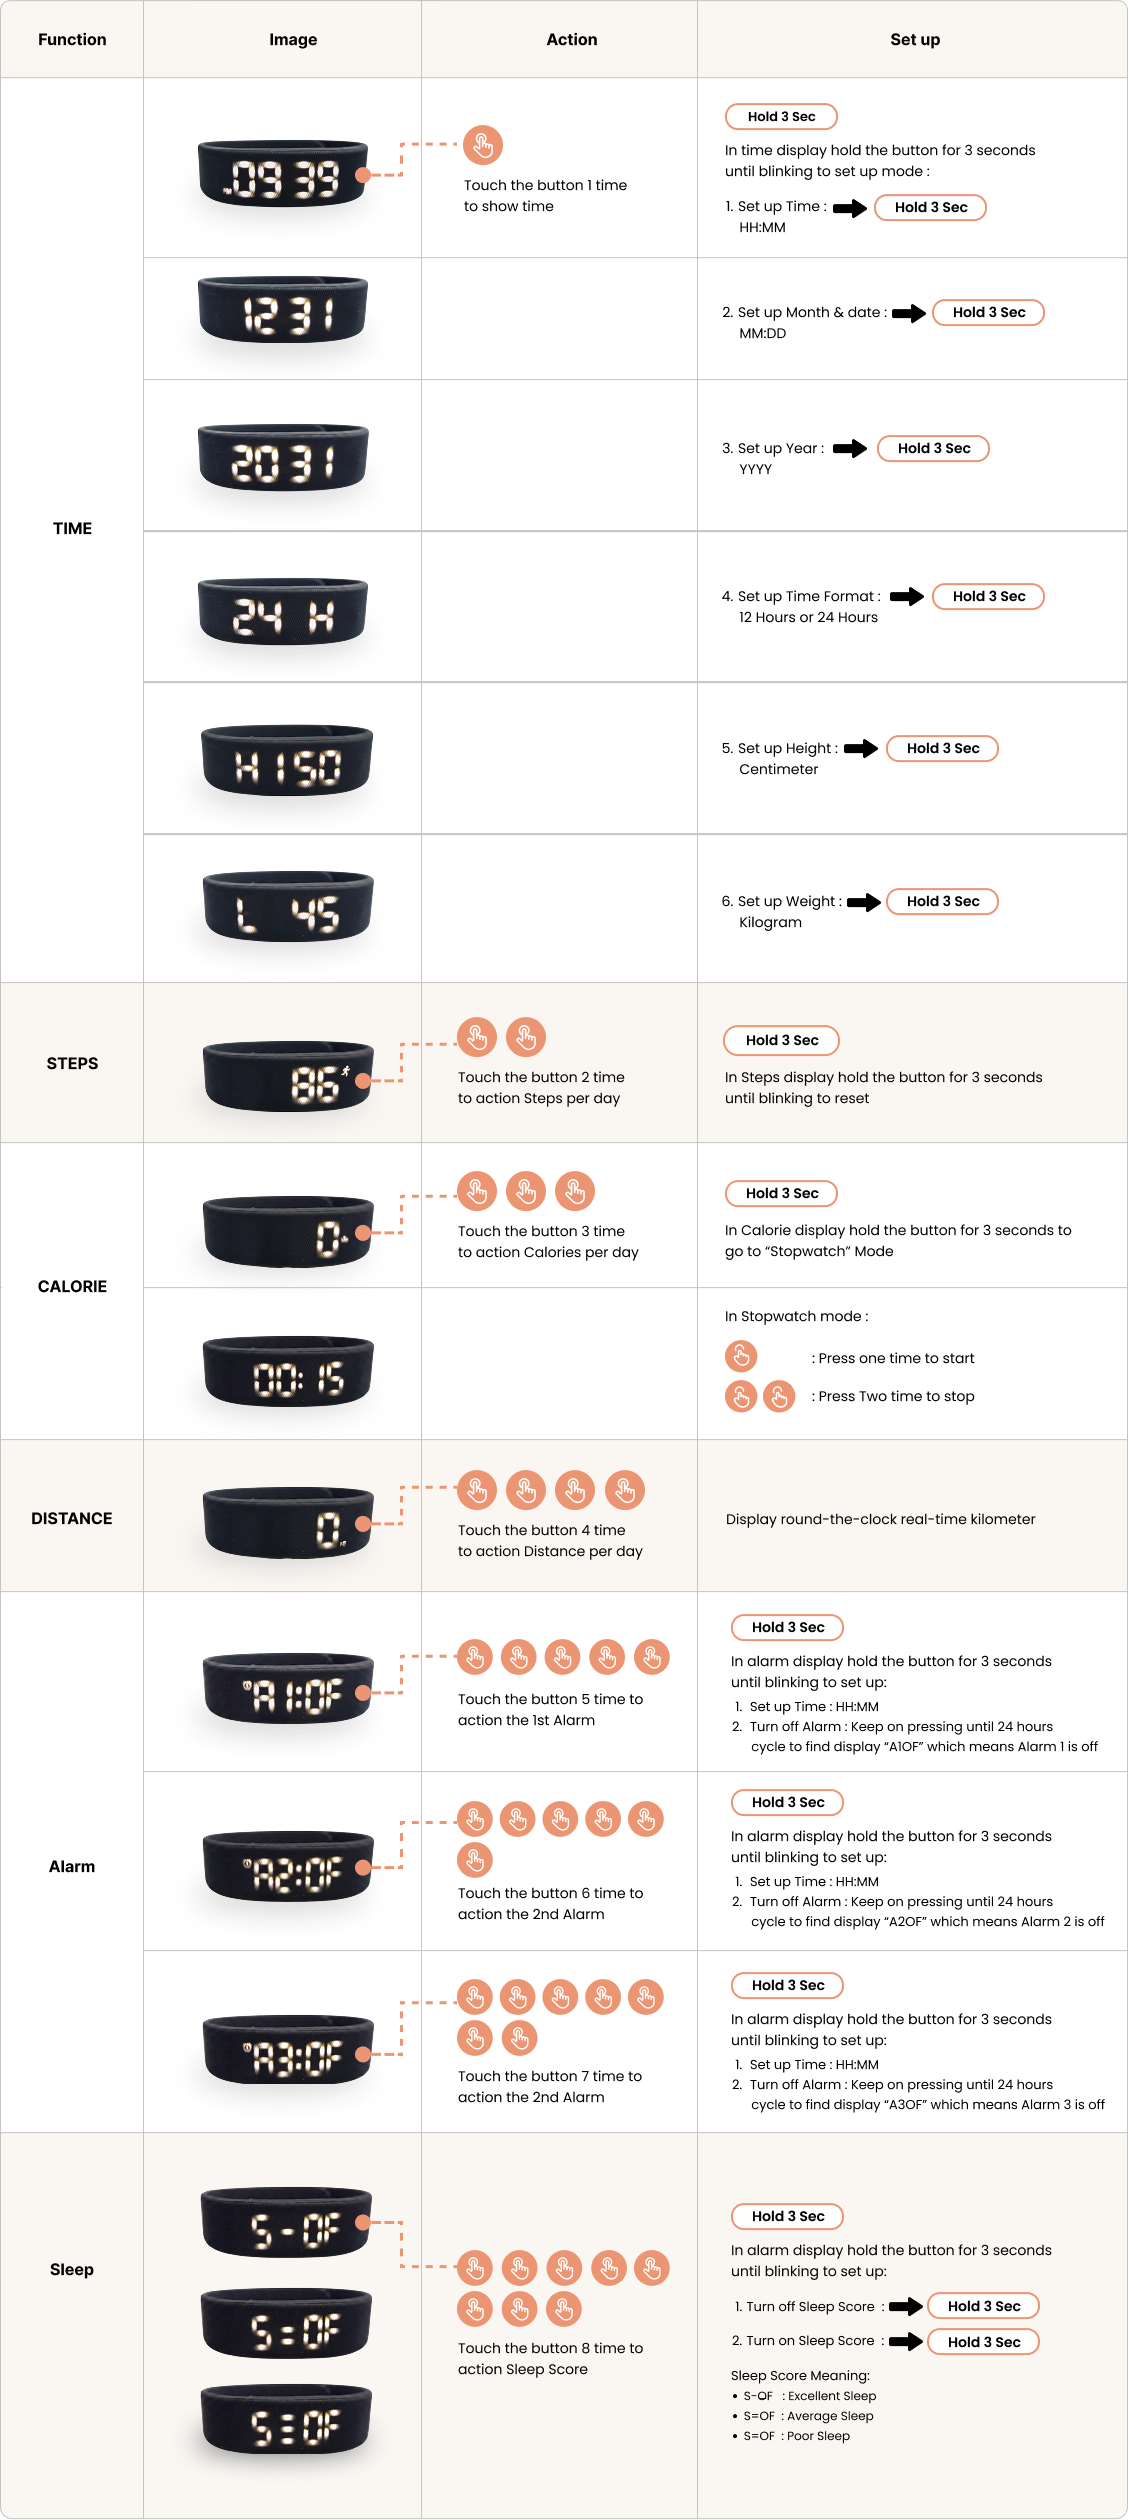
  1. Time/date: Touch the button to show current time and date
    Note: Datetime format on screen: time/date

  2. Pedometer/step numbers: Slightly touch the button for two consecutive times to display the round-the-clock real-time step number (Under the state of displaying step number, long press the button for three seconds to clear current data and start to recount)

  3. Calorie: Triple click the button to show total calories burned for today

  4. Distance: Slightly touch the button for four consecutive times to display the round-the-clock real-time kilometers

  5. Timekeeping: Touch and hold the key for 3 sec to enter the timekeeping when the calorie is displayed, press the key to start and pause, and touch and hold it to quit the timekeeping.

  6. Check the battery level: Under the standby mode, long press the button for three seconds to display the residual electricity quantity of the device; when the residual electricity quantity is less than 10%, the caution of battery charging will pop up.

  7. Set time: In normal time display mode, press the key for 3 seconds, you will come into the set mode, at this time the “hour” begin to flash; the keys adjust the parameters of the hour; after setting the hours, “minute” is set by the following procedures. Month Day Year 12/24 system Height and weightPress the button for three seconds, “minute” flashes, and then press the button to adjust minutes.
    Press the button for three seconds, “month” flashes, and then press the button to adjust minutes.
    Press the button for three seconds, “day” flashes, and then press the button to adjust minutes.
    Press the button for three seconds, “year” flashes, and then press the button to adjust minutes.
    Press the button for three seconds, “height” flashes, and then press the button to adjust minutes.
    Press the button for three seconds, “weight” flashes, and then press the button to adjust minutes.
    After the completion of the settings without a button operation for eight seconds, you will return to the standby mode.

  8. Alarm clock setting: press the key 5 times to display the 1st group of alarm clock, OF means that the alarm clock is default to be the off state, then touch and hold the key for 3 sec to start the alarm clock, adjust the “hour” when the key flickers, and touch and hold the key to shift to min.

    Press the key 6 times to display the 2nd group of alarm clock, OF means that the alarm clock is default to be the off state, then touch and hold the key for 3 sec to start the alarm clock, adjust the “hour” when the key flickers, and touch and hold the key to shift to min.

    Remark: shut down the alarm clock when the setting is OF.

    • The settings of time, stature and weight can also be done through computer AP. Download address of AP: www.asixwatch.com
    • Device Connection: Start the APP. Connect the smart wristband to the computer. Slightly press the button on the wristband to transmit data and synchronize the time.

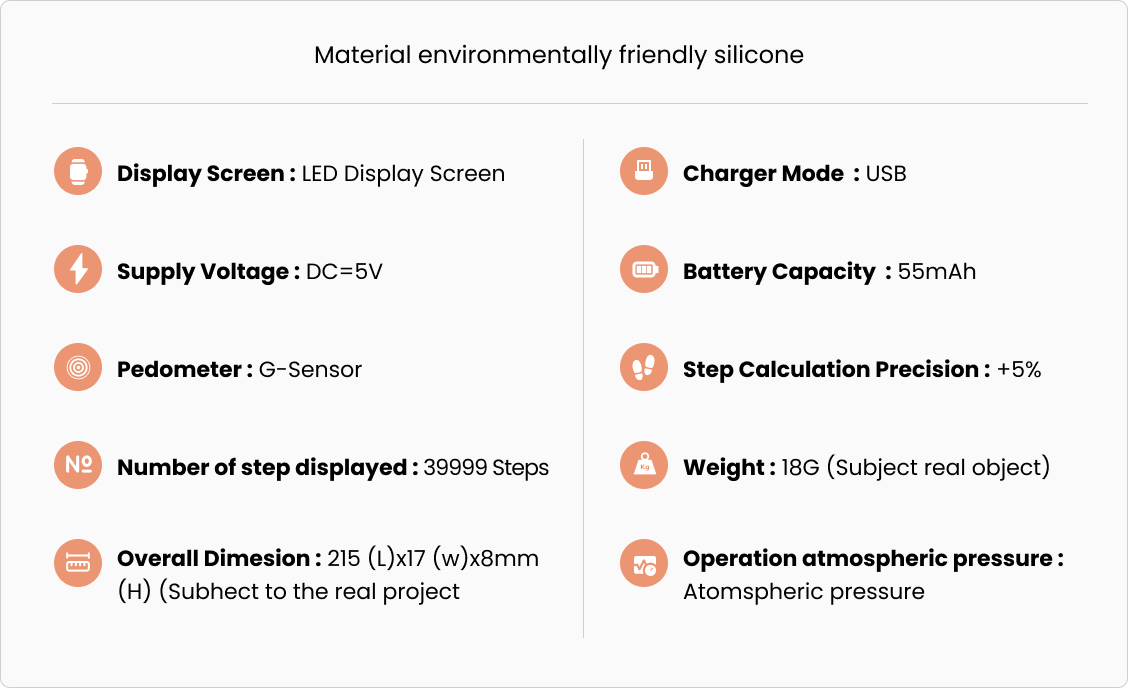
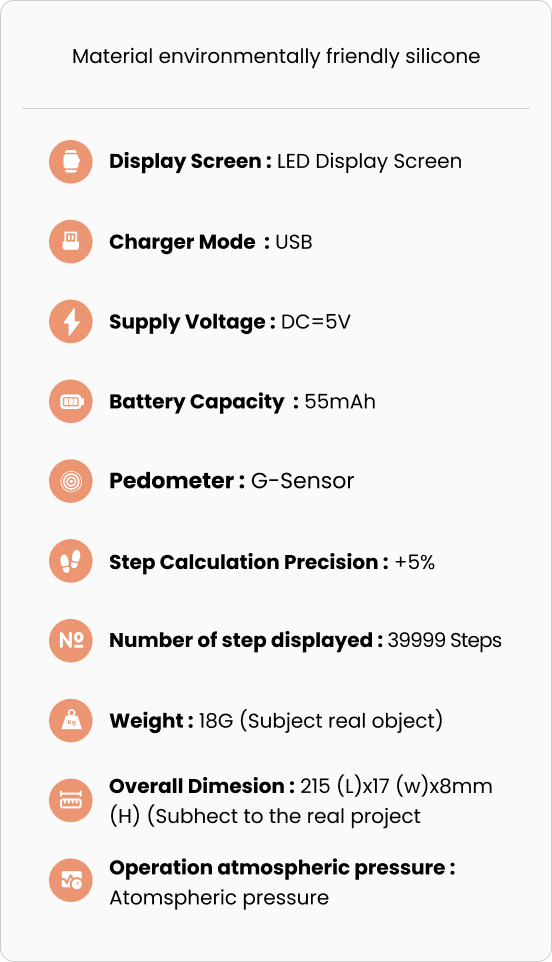
Material: environmentally friendly silicone

Display screen: LED display screen

Charge mode: USB

supply voltage: DC= 5V

Battery capacity: 55mAh

Pedometer: G-sensor

Step calculation precision: ‡5%

Number of step displayed: 39999 steps

Weight: 18G (Subject to the real object)

Overall dimensions: 215 (L)x 17 (W) x8mm (H) (Subject to the real object)

Operation atmospheric pressure: Atmospheric pressure

Let’s start your better morning now

Copyright Bensutori @2026